Royal Enfield Interceptor Owners
You are Not Alone - Check E-mails from around the planetPlease Note Feedback of technical nature, tips, questions and answers from now on are organised in the Knowledge base instead of amongst general e-mails. Stories of general interest are organised under Owners reStories

Dec 2002 Feedback e-mail
Modified Pump Ports
-Ole (Dec 01, 2002)
A guy by the name of Phillip Pick
on oil pump customisation -Bob C (Dec 04, 2002)
Gary from Rooklin, Ontario, Canada
-Gary (Dec 04, 2002)
Pictures of Bill's - (The oil dampening
explorer) Bike -Bill (December 6, 2002)
Diverting the Oil flow-Anti Cavitation
Chamber -Rick (December 13, 2002)
Twin Start Oil Pump(December 14 2002)
David Spires from Omaha Nebraska USA(December
17, 2002)
Jan-Erik from Eksjö Sweden (December
17, 2002)
German Company makes Interceptor
Alloy Cylinders -Klaus (Nov 04, 2002)
Interceptor -65 out of an ice block!
-Kevin (Nov 04, 2002)
Aluminium alloy-cylinders for the Interceptors
-Volker Koch (November 6, 2002)
Use modern synthetic oil for lube problems
-Dave (November 06, 2002)
Homebrew fiberglass tank -Howard
(November 09 2002)
Easy way to tell Connies and Inters apart,
-Dave, Greg, Bob (November 18 2002)
Cafe style tail section available for
a Mk1A -Rick,(November 21 2002)
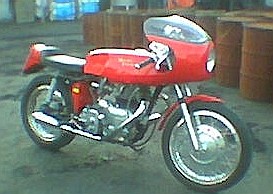
A Finish Cafe-Racer (29 May 2003)
Mikko Huvinen, from HEINOLA in HÄRKÄLÄ, FINNLAND has an Interceptor Mk1 and writes:
My royal is year 1966 U.S model. I make it cafe-raser model. It runner very fast in finnish summer. It kill million moskitos. In Finnland I can see few interceptors, how mutch its makes in England . I like to be member in your interceptor club.
Mikko
I need new exhaust pipes for my Series II.(May 23 2003)
Pete from Lake Forrest Canada wonders:
I need new exhaust pipes for my series ii. I find that places like hitchcock's offers pattern pipes. Have you any experience with this subject---i really would like to find quality pipes that have a good fit. Any advice you can give me will be appreciated.
I've never really seen bad pipes for the Interceptor: originals nor pattern ones. I'd bet Hitchcock's ones are just fine ... I bought a complete exhaust system from him for my 1937 Enfield model JF 4-valver, and the workmanship was excellent.
Nortons on the other hand, are a constant horror to get pipes to fit properly ... not because the pipes are tricky to bend, but because the exhaust ports on Norton heads were never accurately machined at the factory
... especially on the right hand side. Ask any Commando owner about the brutality they've had to resort to, to get their pipes to fit somewhat acceptably. The NOS ones I got for my Norton 850 MKIII were so bad, they required two additional bends to be inserted in the lower run of the pipe !I'd caution anyone to be wary of Armour's pipes: it is a roll of the dice whether you'll get a perfect pipe, or a piece of spaghetti. Again, horror stories abound, though the pipe I bought for my AJS was fine.
Being a fellow Canadian, I'd be interested in knowing where Lake Forrest is
..... gREgg
Pete,
I have a set of hitchcock's pipes on my S2, purchased several years ago, and
they fit great. Can't say if they are the same as he supplies now. You could
always check out Muck Page at Burton's to compare. Hope this helps
Don in NiagaraAgreed re the pipes Gregg, and as a fellow Canadian, I too was wondering
where is Lake Forrest. I've had a lot of trouble with Triumph pipes, like your
Norton experience, but the RE pipes for my series 2 from Hitchcock's were
fine.And for Pete from Lake Forrest, if you are anywhere near Gregg you are very
lucky. There aren't too many who know more about RE's than him. (Okay, you
can blush Gregg.)Bob C.
Why thanks Bob ... it's very kind of you to say !
..gREgg
(kind of grinning and blushing at the same time)-----
Royal,
Very sorry to hear about your accident. I hope you're feeling better.
Received a new set of exhaust pipes for my series ii from hitchcock's. They fit perfectly! Hitchcock's is like having a fully stocked royal enfield dealer right around the corner. I order from them online and six days later, the parts arrive. Even their air freight isn't outrageous. A terrific outfit.
Found a company in fresno, california that would coat the inside of my new pipes with a special heat resistant ceramic coating. Apparently they alum. Oxide blast the inside, apply the coating, and then cure the pipes in an oven for an hour or so. It's a thin black coating--almost looks like carbon---and can be applied only to new pipes. Cost is approx. $100 us. Haven't tried them yet but if they prevent the blue/yellow, it will be money well spent. Incidentally, the chrome exterior of the pipes is not touched.
Also located a guy in northern calif. Who will re-rivet brake shoe linings. You send him your old shoes and he rivets modern linings to the old shoes. When i got them back, they looked brand new. He's not cheap ($95 per pair) and has a long lead time (couple of months). Most of his work, i believe, involves brakes for classic racing motorcycles. If you send him your drum along with the old shoes, he will custom fit the shoes to the drum.
Anybody need further info, let me know and i will pass on the information.
Pete
Proper assembly of the two crackcase halves (22 May 2003)
Hi All.
Kickan is putting the two crank case halves together. In addition to the workshop manual directives, does anyone have additional tips. I've done this a couple of times before, but want to draw sa much expertise as possible from the whole group and at the same time spread any such tips amongst us.
Kickan asked me if she should spread the Hylomare on the warm-hot halves. She's chilling the crank down and heating up the cases before mounting (e.g. boiling water). That's all ok.
Any other tips for the crank case halves, like the procedures by gREgg before on tightening the cylinder head.
There is a term, "blue-lining" (which might be called something in your country) which, as a wee young lad, I observed at Kockums Shipyard in Sweden in 1973 (appretince as I was). In the nex hall, I saw enourmous ship engine parts. They were planned, by painting with very thin blue paint. Then lowering the flat surface down against a wide marble slab. Scuff it around a bit. Rise it, swing it around, and a grey haired old guy with a rare and admired skill, used a sharp instrument to "scrape" off filliments and making the entire half meter wide metal surface flatter (totally plane) to within an hundreth or less of a millimeter. Is something like this ever done on crank case halves. Naturally we are talking about very small amounts of metal to be scuffed off here (or things won't fit), to make it seal even better.Who would you expect to find that does it.(pref. in Australia) Which type of workshop. I have a bit of a mania about getting this thing completely oil leak proof. What are your experiences with sealants. Hylomare? or is there any silicon based stuff one can trust these days?
Regards
Royal and KickanRoyal
sounds like 'scraping the bearings', which have been coated with Prussian Blue,
plus something reminiscent of a surface plate - Prussian Blue and for much
bigger bucks, surface plates, are still available at machine shops/supply houses and auto specialty stores - bearing scrapers are not still available to the best of my knowledge . . . they can be made from old triangular files, but bearing scraping in my experience was predominantly asociated with idiosynchratic babbit bearings on early autos . . . for what it's worth . . .
George in VermontMy personal choice for crankcase sealants is 'Yamabond' a silicon based sealant, grey in colour which blends well with the crankcase. Available from Yamaha dealers. For paper gaskets, I literally paint on a super thin coat of 'Wellseal' a British product, onto each side of the gasket face. I use a small kid's watercolour paintbrush, dipping it into the tube.
Wellseal also works well on crankcase halves (it never sets) but if there are any blemishes on the faces, Yamabond is a better filler/ sealer.
Roger.
(Pennsylvania USA).Royal,
Just let me add my own experiances on this crankcase assembly business:
Firstly, scraping. A good engineering company should have the means to take say 10 or 20 thou from the surface of the case and leave you with a really flat surface, but surely this is only necessary if the surface is damaged. I did this some 20 years ago (!!) when I first bought the Series II as someone had levered the cases apart...
Alternatively if you want to do it yourself, use a sheet of plate glass. This is readily available anywhere, relatively cheap and perfectly flat. In the UK the stuff to use was known as Micrometer Blue though may have other names today.Assembly. Easy, really; warm the drive-side case and enter shaft into race. Fit spacer, sprocket or whatever then tighten using sprocket nut to draw shaft through bearing. When tight, leave to cool down.
Mount on blocks horizontally, mating face up of course, and apply your preferred goo (I use Loctite) to the cold face. Warm timing side case, and gently drop over bearing. It may be worth using string on bearing to retain rollers; alternatively heavy grease on the rollers should help to keep them together.
As for sealants, Enfields used Wellseal which is still available, but there are better ones now. I use Hylomar on the heads and cross-rings; so far, with good results!
Important point;After torquing headbolts (to 23lb/ft maximum), run the engine for approx. 500 miles / 700 kms gently then remove head steady and re-torque heads (reset tappets of course). If you don't do this you will suffer head leaks once you start to use large throttle openings!
Cheers,
Dave HollymanHi Royal
Take a look at this site - great site bye the way - with a lot of great tips and tricks for the bike mechanic: http://www.dansmc.com
He is recommending a great stuff called Yamabond #4 I have found it here in Sweden from the local Yamaha seller. Quite expensive! But very good stuff I am told from several sources...
I have read a lots of warnings to use the silicone based sealant, "leftovers" get stuck in narrow places and engines have seized!
====================================
The thin blue colour is called Machinist Dye in English. "Skavfarg" in Swedish you could get it from the nearest tool shop. An alternative is an ordinary marker pen.Best regards Anders
Scraping mating surfaces to make them perfectly flat is a highly skilled craft, which if done poorly will result in disaster.
BTW, the 'bearings' that were intended to be scraped are quite a different variety than our modern Vandervell-type shell bearings ... which must never, ever be scraped. IN the old days (like Ford Model T days), crank bearings were poured into place using molten Babbitt, which then had to be scraped to get a proper clearance.
The other traditional use for scraping has been on lathe (and other machine tool) bed ways, to compensate for uneven wear from use.
Scrapers come in many sizes, and as George stated, can most easily be made from grinding smooth an old file. As for sources, the need to use scrapers has diminished greatly with the proliferation of precision machinery. I have ones made by both General and Eclipse, and I note from a quick search that at least http://www.csosborne.com/brscrape_1.htm is still marketing them. Note that if you can have only one, a triangular one to get, but they come in as many shapes as you can imagine.
There is little more satisfying than using a good quality scraper. Honed to razor sharpness, there is little you can't cut with one ... while a cheap one isn't worth blazes.
While Royal had mentioned use of a marble surface plate, I think you'd find marble far too soft for the task. There are many suppliers of good black granite surface plates which are quite accurate and very hard. They come mainly from Asia (go figure), and an 18 x 24" plate can be had for about $75 ... well worth the investment for many workshop tasks involving measurement. But, beware, it can get addictive, and you will soon find yourself owning a vast array of measuring tools to go with the surface plate ...
... gREgg
(More on Proper assembly of the two crankcase halves)
In terms of sealants, I've used Hylomar on a couple of engines, but found
that it skins over too quickly. There are much better sealants these days.I've moved to using two products, depending on the application ... as in the old saying: "It's horses for courses". The first is an anaerobic flange sealant ... Loctite 515 ... which is perfect for metal to metal joints because it only cures in the absence of air. It fills small gaps up to 0.005", and cleans up easily because the stuff that squirts out of the joint will not cure.
The second, which I use on Cross rings and push rod tunnel seals is GE high temperature silicone sealant ... which must be exposed to air in order to cure. When you consider the different curing characteristics, you may get an appreciation as to why one would use one over the other in certain applications. The Silicone I use is gray in color, and is almost invisible against alloy cases. BTW, note that this is 'Silicone' (ending with an 'e'), a synthetic rubber compound; and not Silicon, which is an element (pardon one of my pet peeves).
As for achieving oil tightness, the first thing to do is to ensure you eliminate basic flaws. Get the mating surfaces flat, yes. But also make sure you eliminate as much of the pressure that is causing the leaks. Proper crankcase venting (which I believe I've described before), and the use of 'Total Seal' piston rings will do wonders in this regard.
Assembling the cases can be tricky, because the bearings fit the crank very tightly. That is one reason Enfields specified a 'C3' or '000' fit bearing for the mains. Be very sure you do not forget the taper-faced spacer on the drive side ! Also, a puller is the proper way to get the drive side crank into the inner race. Careless pressing (or heaven forbid ... hammering!) will damage the bearing races. Boiling in water or heating the cases, while it works to increase the clearance during fitting ... can be a problem because of the deleterious effect on the sealant. It will also make the
sealant cure too quickly, if you somehow manage to protect it.The timing side bearing is often a horror show to get started, and I always resort to making a small lariat of string to hold the rollers in while offering up the case. It is best done with a helper ... a "two donkey job". Also, do make sure your timing side bearing seal is in good shape, otherwise you will have oiling problems.
Also the oil quill feed seal should be replaced no matter what. When I was at Hitchcock's in March, I picked up one of their revised nylon quills, which is supposed to work well ... not that I believe for a moment the BS stories of compensating for crank flex. It does however seem like a more robust solution, given the right choice of material for the spigot. I'll find out for sure fairly soon.
As my final word, be absolutely certain to pre-lube the main bearings (and everything else too) to prevent a dry start.
That's about all I have time for now .... hope it has been of interest.
.. gREggHi Kickan
Good luck with that job ! I think Gregg kind of said most there is to say. I use Yamabond too, and as Gregg said, its when you've got the crank in the driving side half, have applied the Yamabond - and then try to get the timing side on, that trouble really starts. It's usually a most frustrating process. So don't do that !!! Do it the other way round ! : Fix your timing side half to your work-table and do the difficult part before you even start to think about applying sealant.
Once you've got your crank (with conrods) sitting right in the roller bearing you can go take a bath and a snack! When you get back the rest of the process - cleaning, applying sealant, and pulling your driving-half in place with your puller tool - is a peice of cake. Be sure to keep all crankase bolts tightened to max preload at all times especially the 4 that are accessible from the timing cover opening - in order
to try to minimize the "scruffing" that will occur below the cylinders.Best wishes
Ole, DenmarkHi fellas
I don't spend a lot of time at the computer but rest assure that I read all your wise words and will read them again before I launch into that important job. The surfaces look pretty good and I was being very careful when I parted the halves.Until next time
Kickan
My father's '64 single carb Inter(May 16 2003)
George II from Yucaipa, California writes:
Hello men, found the site sometime last year, think I registered but...
I have started the rehab of my father's '64 single carb Inter. I planed to just clean it up and ride it. Then I found some polishing compound and some rust. You can guess the rest. I'll post some befor and after photos including some my father took when the bike was new.
Until then, ride on
George II
Interceptor Magnetos(May 13 2003)
Got the '65 Interceptor running today, I set it up with a Lucas SR2 magneto from a Super Meteor. Spark is very so so, not exactly fat which made starting hard.
Still, not bad for a 50 year old piece of electrical equipment!Always liked the SR2 mags but can anyone recommend someone in the USA where I can get it re-magnetised and new capacitor fitted?
Roger.Congrats on getting the old boy going!
The SR2s always give an excellent spark, especially at low speeds, and its not hard to keep them that way. I'd find it hard to believe that it needs magnetizing.
If I were you, I would clean and gap the points (standard Lucas fare), and replace the capacitor. The capacitor is a standard Lucas can type, of the type you often find in British car applications. You may even find one at your local Pep Boys store. Its easily accessible inside the housing, and is about a 10 minute job to replace.
.. Gregg
Roger,
There use to be a Gentleman in Allentown, Pa by the name of Perry Gearhardt that did all of what you are seeking to have done. However, he left Pa a few years back and now is in Florida somewhere. He's also out of the business.
However, another gentleman from the AJS/Matchless Owners Club of America has stepped up and taken over Perry's business. I believe his name is Wayne. I suggest you look up the club on line and track him down that way. Another point of contact in that club is John Diedrich, a real gentleman and has been a great help to me in the past.
Hope this helps,
Rick
Hi Roger
I don't remember where you are located, but I have had good results dealing with two people in the US. Mark Seibert did 2 K2F Mags for me includeing the one on my 65 Interceptor. he does remaging and he is located here in So Cal. E-mail Address mseibert@adelphia.net. The other is Bob Kizer
Cypress Ignition Ltd.
Oak Plaza Dr.
Cypress, TX. 77429
281-955-6100Email PODtronics@aol.com
Hope this helps
Orlan
Converting Amal Concentric carbs on their Interceptor(May 12 2003)
Message: Hi. Was wondering if anyone has converted the original
Amal Concentric carbs on their Interceptor to the Amal MkII? If so,
did they use the listed jetting for the standard Interceptor or did
they have to change sizes, etc. Any help or shared experience would
be greatly appreciated as I'm about to mount a pair on my MkIA.
Thanks, Rick
Rick
I think Dave Hollyman, Cardiff, UK could help you. Follow Royals link to his site. You'll find his email address there...
Best regards
AndersRick,
I use Mk. 2's on my Series II. The settings are the same as for Mk. 1's but be warned: if the pilot setting is not perfect starting can be difficult. Also the "choke" can be a problem. In fact it is merely an enrichment jet (I use a 30 but you can try others).The problem is that the pipe that extends into the float chamber may not quite reach the gas. To cure this I warmed up the plastic floats and gently bent the mounting to effectively raise the fuel level in the chamber. This seems to have worked and I also try to make sure the carbs are slightly "downdraught" when mounting them on the rubbers.
The carbs are great when running well but the pilot blocks easily. This is usually a tiny hole in the throat of the carb close to the manifold. A single strand from a Bowden cable will normally clear it so I carry one with me!Starting procedure is thus: Turn on choke lever(s). Turn over engine twice.
Switch on ignition (in my case Boyer-Bransden electronic). Turn engine just
past compression, and kick hard. This normally works first time. Best of luck!
Dave Hollyman
| lettermay03.htm
|